and to all a good night!!
Wishing each and everyone of you the peace and love of this Blessed season!
and to all a good night!! I've been really busy with my new endeavor with Stampin'Up! I've been getting ready for a craft fair that I was doing with 3 other crafters/Stampin'up! folks. It was short notice to try and do some things to add to our space. I was going to put some of my baby shoes in and I made 5 pair. But I had a lot more fun doing my Altoids boxes, so I concentrated on making them.
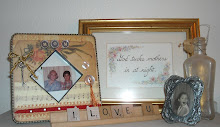
 I borrowed most of the stamps on this card from one of my Stampin'Up! friends. It is a retired stamp set which makes me very sad as I love it so much that I'd love to have it! Guess I'll just have to borrow it from her when I want to make more from the set. I used it a lot on my boxes.


 Recently I've taken a big step and joined Stampin' Up!, a company with a great reputation and fabulous products. I have done stamping before and really enjoyed it. Since last February I have been a member of a card club that meets once a month. We make 3 projects each time. Usually at least 2 cards and I love it. So this last month I took the plunge and am going to be a demonstrator.
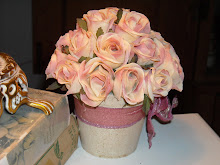
 This is the before picture of the box in the next picture. I covered it with paper and antiqued it down with dark brown ink. Added lace and some old buttons


 Here we are with my blogging buddies! L to R: Beth, Me, Jenn and Karla at the Round Top blogger party. Nice to see the real person where it just was a picture before!! And guess what! They are just as nice as they seem on their blogs!! We really enjoyed our brief visit with them both!!
 Last week while reading Beth's blog (http://bethleintz.typepad.com/gatheringdust/) )she posted that she and her buddy Karla (http://karla'scottage.typepad.com) were going to Round Top. WOW!! Now I know most of you know what Round Top is but for those who don't, it is just the most fabulous antique and flea market this side of Paris. They weren't going primarily to shop but just to see it, absorb the ambiance and meet up with friends.
 Beth and I exchanged e-mails and decided that if Jenn and I wanted to, we could meet up at the blogger party that was being given by one of the exhibitors. She said see how you feel on Sunday and if you're up for it take a road trip.


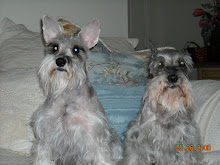
 If you can't find a great antique bed here it just doesn't exist!!
 There is an old adage that goes..the best laid plans of mice and men often go a rye. That is what I found out when I started to use my new room. It looked fabulous but when I started using it as a craft room it fell a little short. Nothing was readily available and felt somewhat awkward. I've had to "tweek" it a bit. That involved moving a lot of things around. I moved the family area around and consolidated it a little, expanding the craft side more. I spent the majority of yesterday rearranging furniture and seeing what looked best. I'm going to live with this arrangement for a while and see if this works better before I make it permanent. I guess time will tell........ Any thoughts??


 As you enter the door you will be greeted by the old fashioned screen door. I have great affection for this door. I personally carried it on the top of my X-Terra all the way from Mobile Alabama a couple of years ago.
 Here is the slick surface that rejected the book pages. They are inexpensive modular units that I bought at Target about 5 years ago. I primed them and painted them the soft blue of the Forget- me- not in my rose fabric. I then went around my house and pulled things from all over my house to create this display. The good thing about gleaning things from the other parts of the house is that it pared down some areas where I probably had a little too many things, if that is possible! The piece of gingerbead came from a closeout sale at Wimberly, a flea market in the Texas Hill Country.